


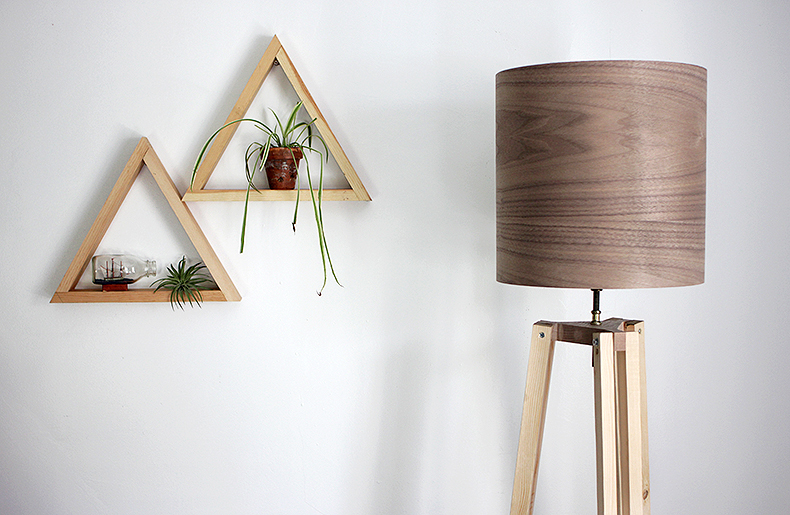
Lately I’ve seen a lot of tripod floor lamps that I’ve been loving. One of my favorites are vintage wooden tripods turned into lamps. I’ve been wanting to update the lamp in our living room for a while now and thought one of these lamps would be fun to make. You can find vintage wooden tripods on eBay or even Craigslist, but I thought it would be fun to try making our own tripod, instead of scouring the internet, waiting for the perfect one at the perfect price.
So if you’ve been loving these lamps lately and don’t want to pay a hefty price for a new one, and can’t seem to find a vintage one anywhere – here’s how to make your own wooden tripod lamp!
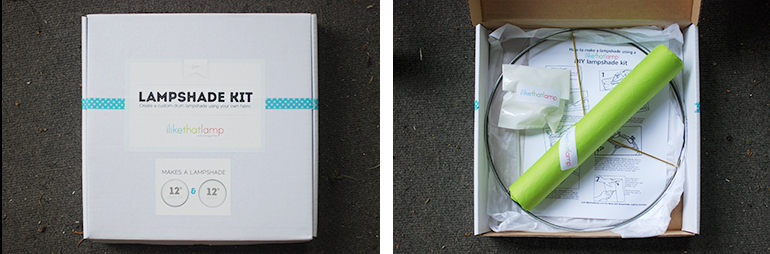
I love using wood and lots of it around the house, so I thought we should try a veneer lampshade for our lamp. When Kiri from ilikethatlamp contacted us about the lampshade kits she sold, I thought this project would be perfect to try it with! These kits are so fantastic – everything you need to make your own lampshade, sent to you in a box, you just provide your own fabric or material! I love the idea of making your own lampshades – it’s so much more fun to be able to get just the look you want and add your own personal touches. She has lots of inspiration and tutorials on her site too if you need ideas to get you started!

What you need:
(I know it seems like a lot, but you’re making an entire lamp and lampshade!)
- 5/4 pine board (you can buy precut 1×1 boards to use and save a couple steps, but it will make your lamp pricier)
- circular saw
- scroll saw or jig saw
- planer
- sander or sandpaper
- piece of 1″ thick wood (we used a reclaimed oak stair tread – any variety of 1″ thick wood will work)
- clamps
- drill
- screws
- nuts
- washers
- wood glue
- knife
- angle brackets

- measuring tape
- staple gun
- diy lampshade kit
- veneer
- binder clips (some included in kit, will need a few more) or clothespins
- hot glue gun
- industrial strength adhesive glue (like E6000)
- light socket kit
- threaded lamp pipe (only needed if you want to raise the shade up)

How to do it:
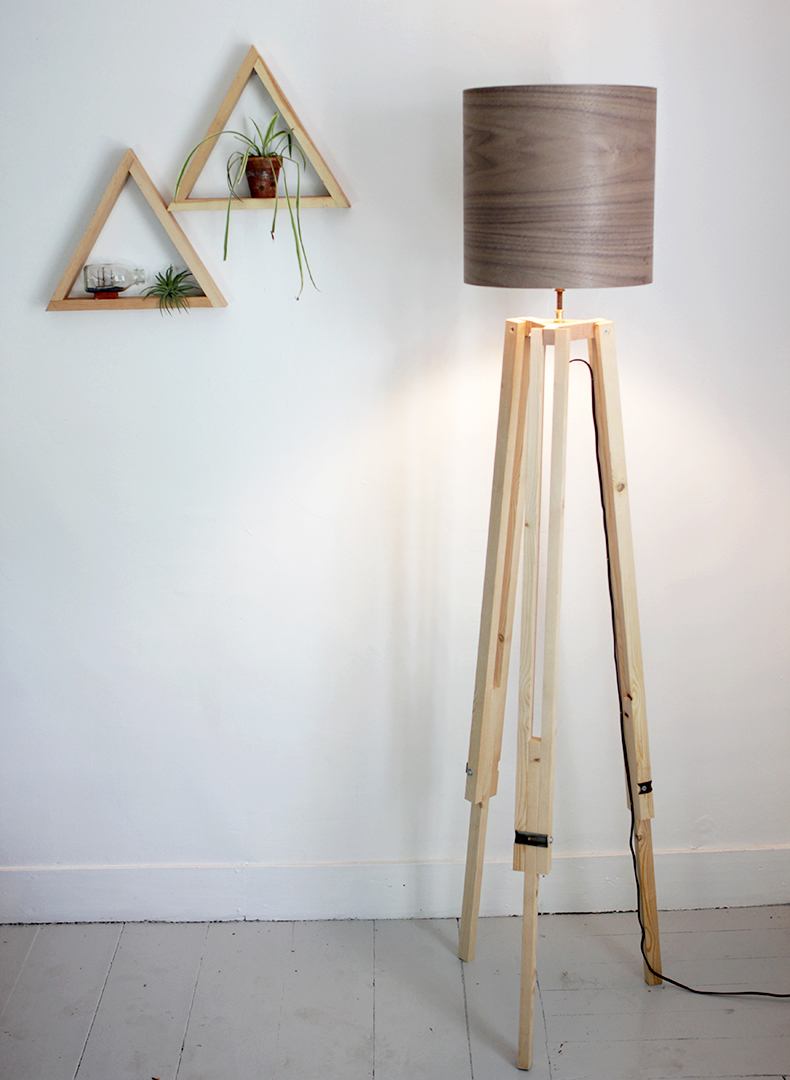
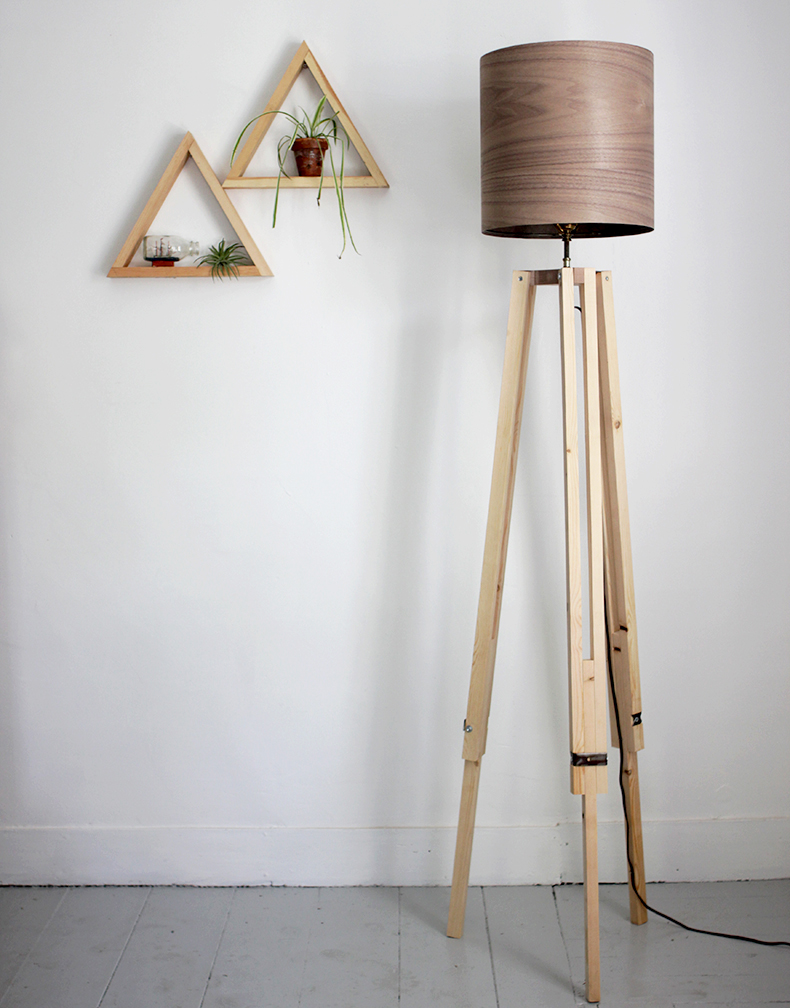
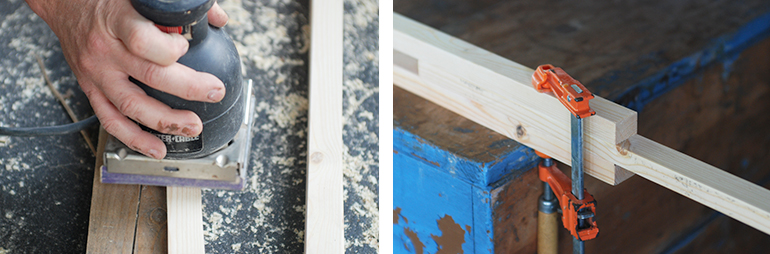
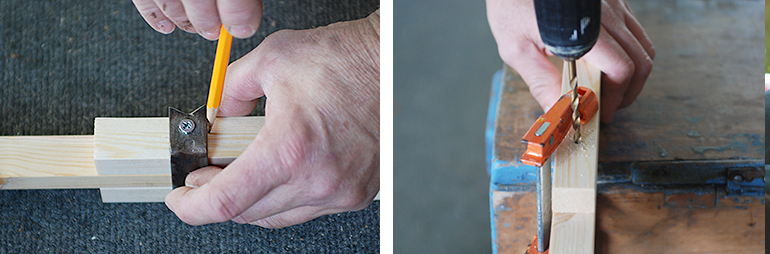
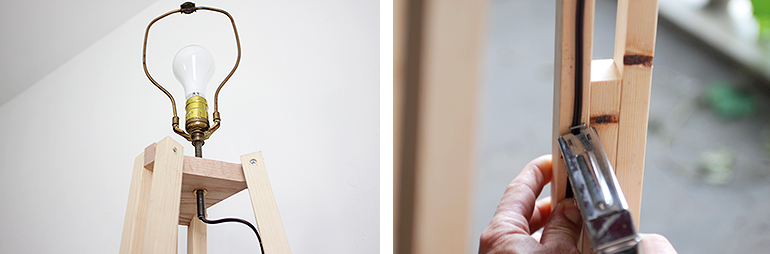
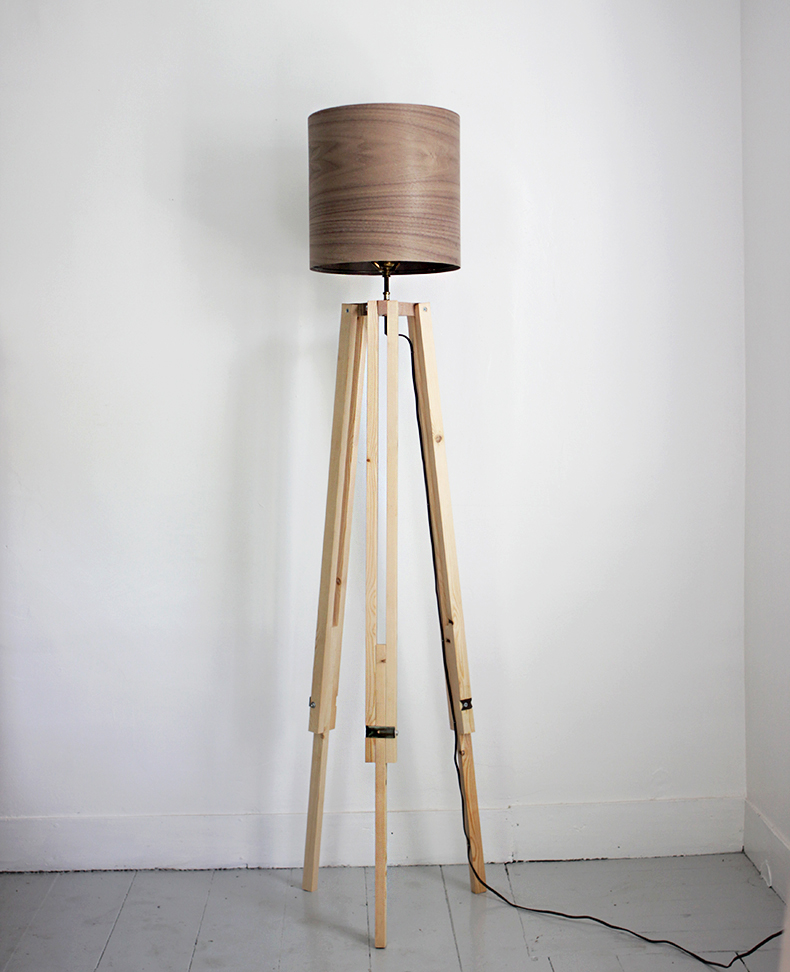
For the tripod lamp: Cut the pine board into 1×3/4 strips. You will need 6 upper pieces that measure 3 feet long and 3 lower pieces that measure 2 feet long. Plane off the saw marks. Sand down all the pieces. Arrange one of the 2 foot long pieces between two of the 3 foot long pieces, leaving about 14 inches sticking out below the bottom of the longer pieces. Glue and then clamp these pieces together. Repeat with remaining legs. Cut the angle brackets so that they fit around the side and front of the legs. Use the angle bracket to mark where you will drill the leg. Drill a hole through the middle of the short side of the legs, big enough for the screw to fit through.
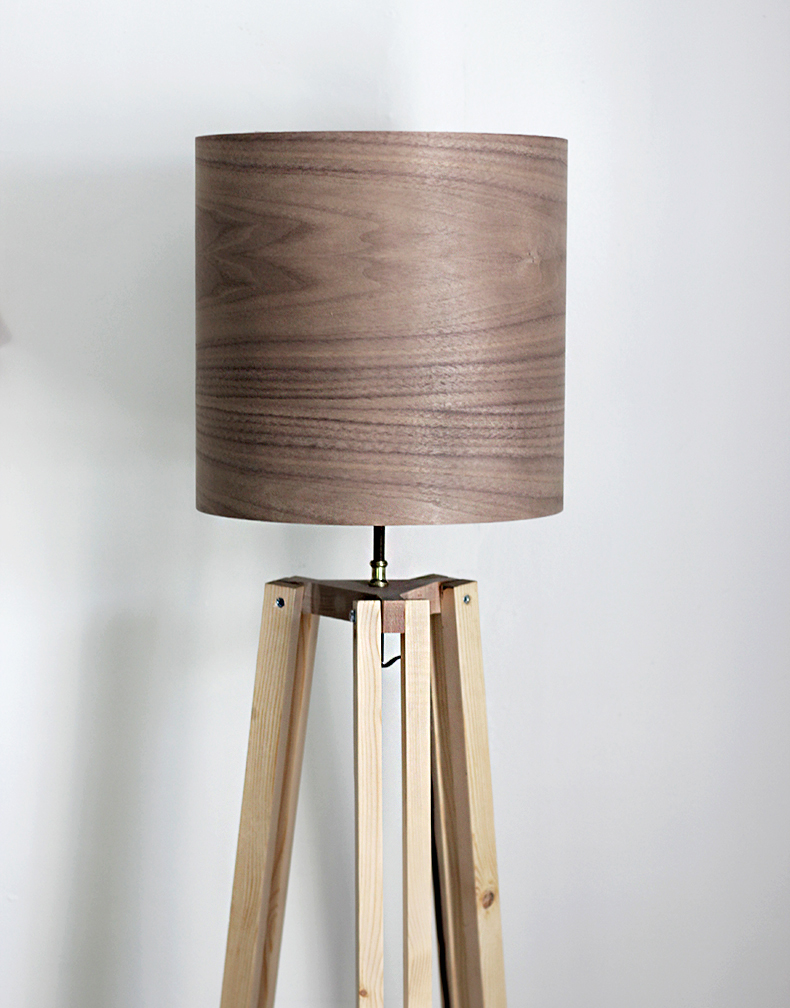
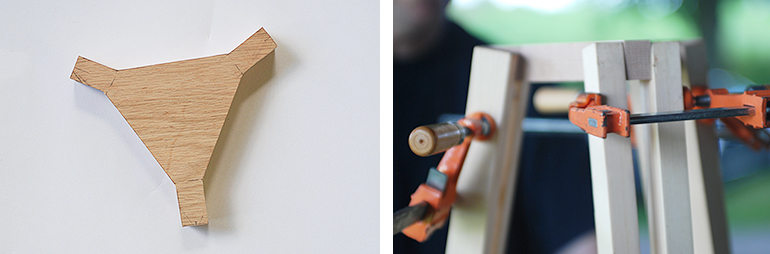
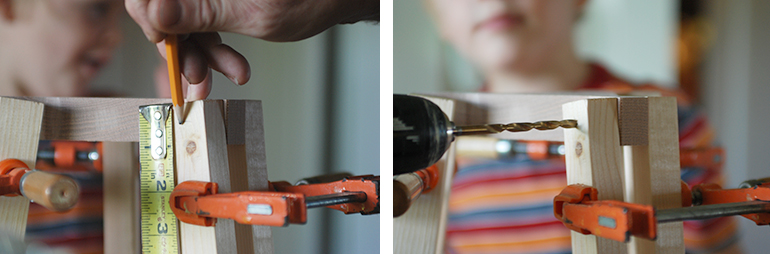
Draw out a triangle on the 1″ thick piece of wood, leaving 3/4″ ears sticking out (to attach the legs to). (Our triangle measures 3.5″x3.5″x3.5″ between the ears) Cut out the triangle piece using a scroll saw (or jig saw). Clamp the top of the legs to the triangle piece to figure out what angle you want your legs at. Once the legs are the angle you want, measure and mark the spot to drill a hole. Drill a hole through the legs and triangle piece. Unclamp the legs one at a time and add wood glue to the very top. Put the screw through the hole to line it up and re-clamp the leg, making sure the angle of the legs are correct. Repeat with the other legs. Once the glue is dry, put the nut and washer on the screw and tighten. Repeat with the other legs and remove clamps. Drill a hole in the center of the triangle big enough for the threaded rod of the light fixture to fit through. (If you’re using the threaded lamp pipe, attach it to the socket base). Use a nut above and below the triangle piece to tighten the threaded rod to the lamp base. Feed your electric cord up through the rod. Attach wires to the connectors on the light socket. Snap light socket back together. If desired, staple the cord to the leg.

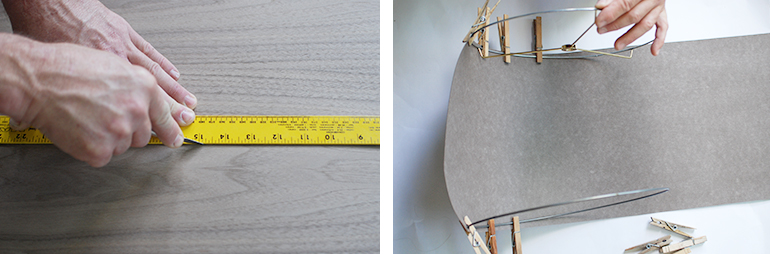

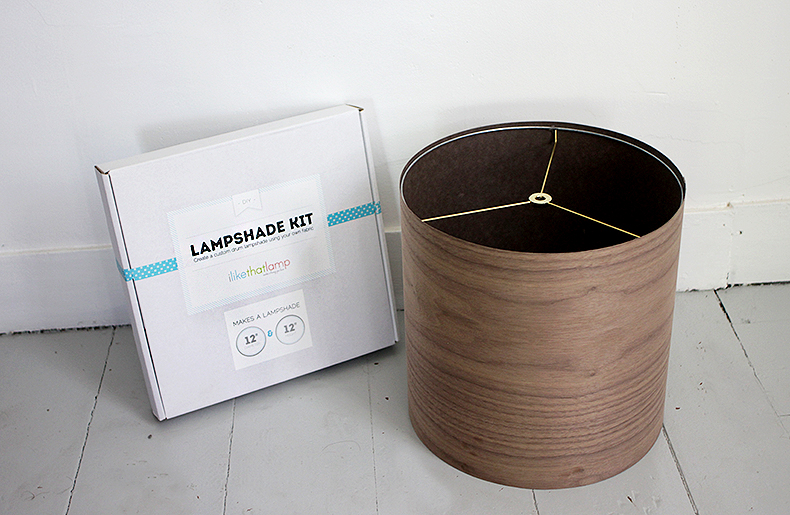
For the veneer lampshade: Measure the circumference of the lampshade ring. Measure that out on your veneer and mark it, adding about a inch for overlap. Figure out how tall you will want your lampshade to be and measure and mark that on the veneer (ours is 12″ tall). Cut the veneer to size with a knife. Lay the veneer face side down and line up the lampshade rings along the edge. Using binder clips or clothespins, clamp the veneer to the lampshade ring, slowly rolling it as you go along. (This is a lot easier with 2 people, one doing each side) Once the entire piece of veneer is clamped to the ring, glue the overlap of the veneer together using wood glue. Once it’s glued, clamp the veneer seam, we did this using by lining 2 boards along the seam (that fit in between the lampshade rings) and then clamping those boards. You want to provide firm support the entire length of the seam while the glue dries. Once the glue is dry, remove clamps. Hot glue the lampshade rings to the inside of the veneer in a few spots along the top and bottom of the ring (this is just to hold it in place while you put the next glue on), then use a small amount of industrial strength adhesive glue around the entire ring to securely attach veneer to rings. Attach the shade to your lamp!
*Just a side note about the kit, it does come with an adhesive styrene sheet to use with a fabric shade, but since we were using wood, we skipped this step, since our shade didn’t need the extra lining. Obviously if you’re not using veneer, you will want to include this step, and the directions in the kit tell you exactly how to do this.
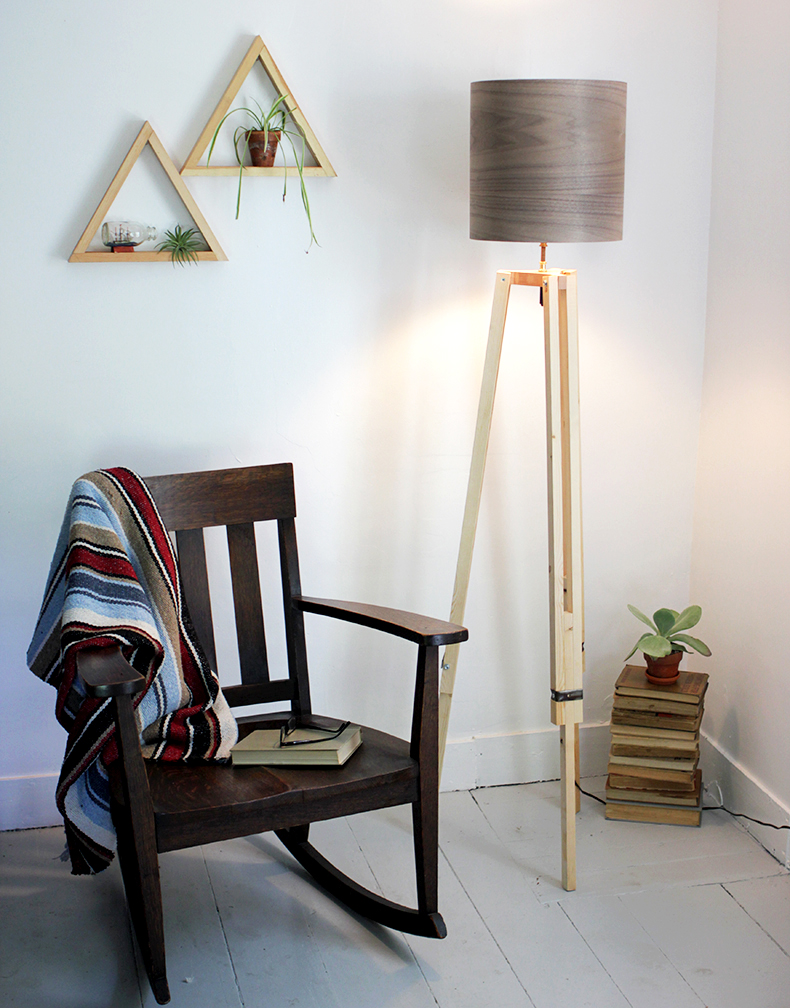
What do you think…do you like the look of tripod floor lamps?? Looking for more lighting inspiration? Check out these lights we’ve made: Desk Lamp | Branch Table Lamp | Hanging Wall Light | Leather Pendant Light | Wire Basket Lights | DIY Industrial Light
-Manda
DIY Lampshade Kit was provided free charge by i like that lamp. All thoughts & opinions expressed, as well as this tutorial, are our own.

