


Before leaving for vacation, I was wandering around the house, watering all my plants and thinking how much I felt like my mama. Her yard & home are filled to the brim with flowers & plants – and I always remember her tending to all her plant “babies” before leaving on a trip. And while I’ll never come close to having the green thumb she does (I still consider gardening a detested chore!), I’ve grown a soft spot for indoor plants and am slowly building up a little collection – mostly succulents as that’s really all about I can keep alive!
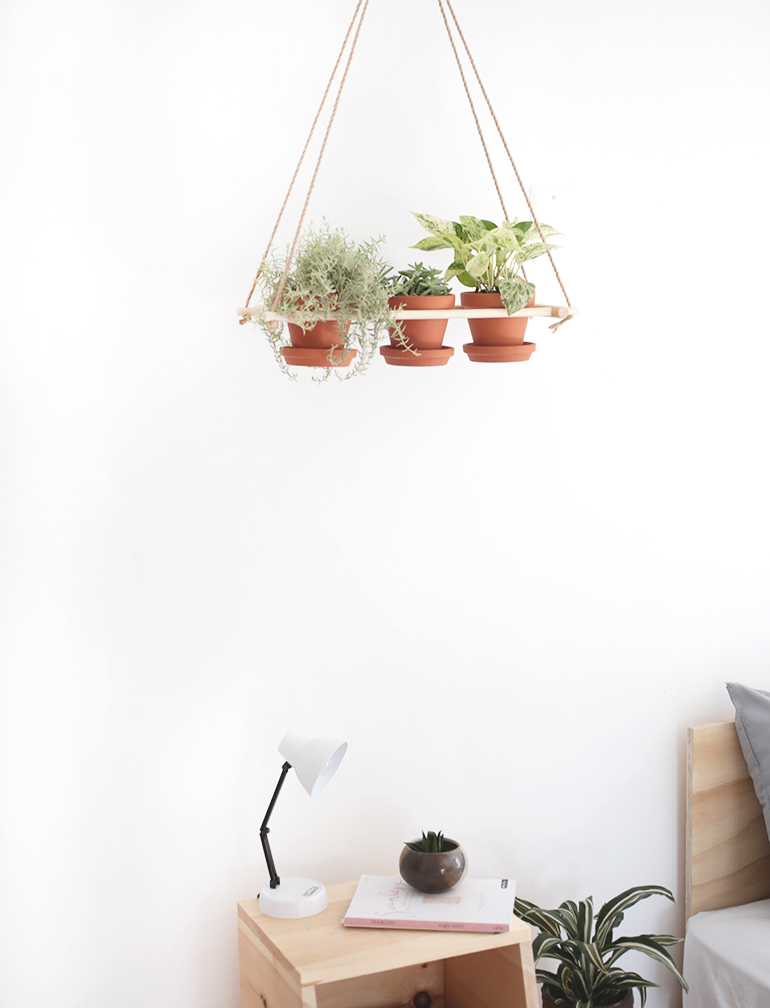
As my collection is growing, I’ve been trying to come up with places to keep my new plants and a hanging planter that could hold multiple plants seemed like a good solution – making use of wall and ceiling space that otherwise goes unused! This DIY that’s perfect for those with a green thumb and need more space to display all those lovely plants!
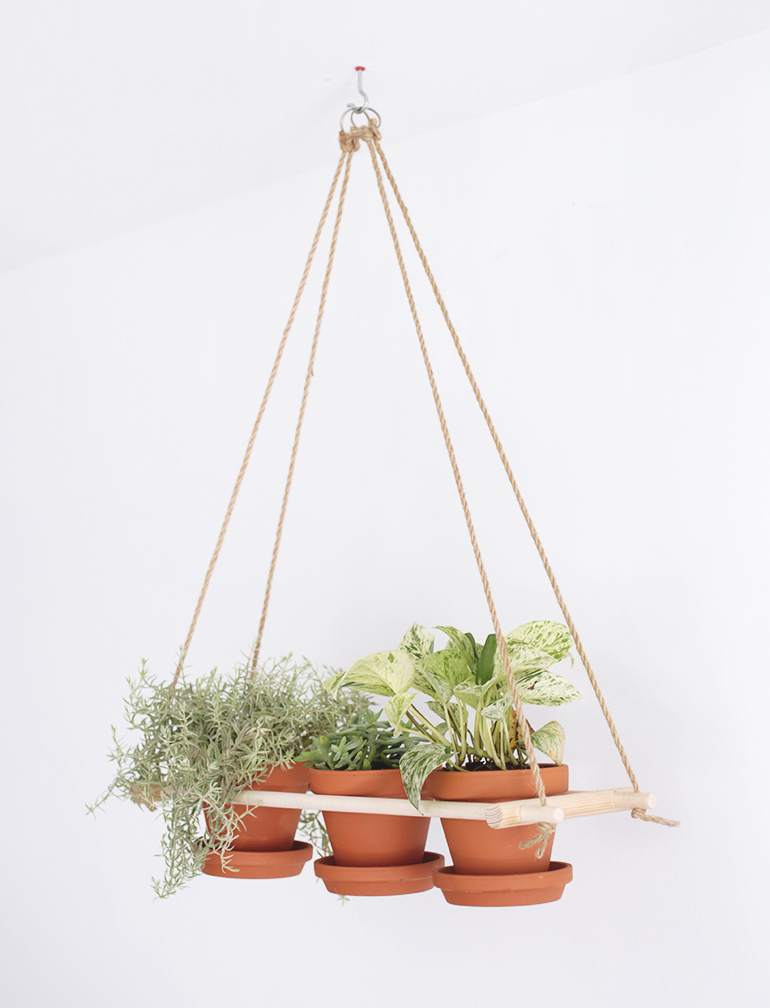
DIY Hanging Planter:
Materials Needed:
– wood dowels – 2 sizes (ours are 1/2” and 3/4”)
– measuring tape
– pencil
– miter box
– drill press
– drill & drill bits
– sand paper
– wood glue
– rope
– 2 large jump rings (ours our 1”)
– terra cotta pots with bottoms*
– two part epoxy
– plants
– ceiling hook

Directions:
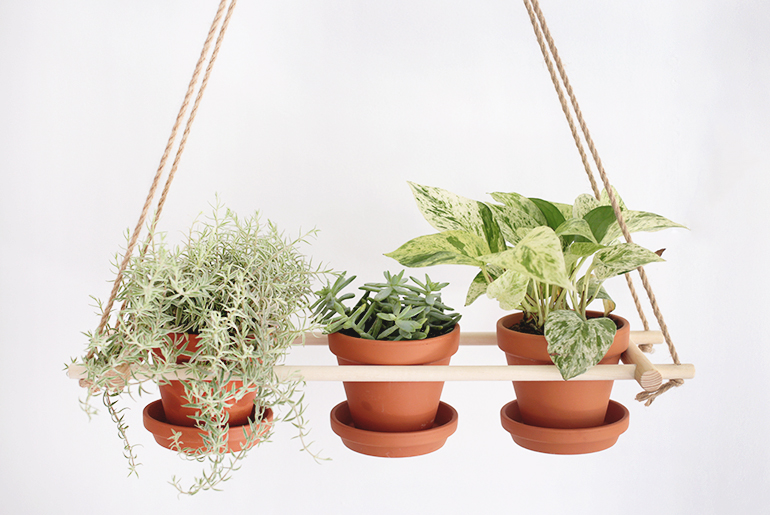
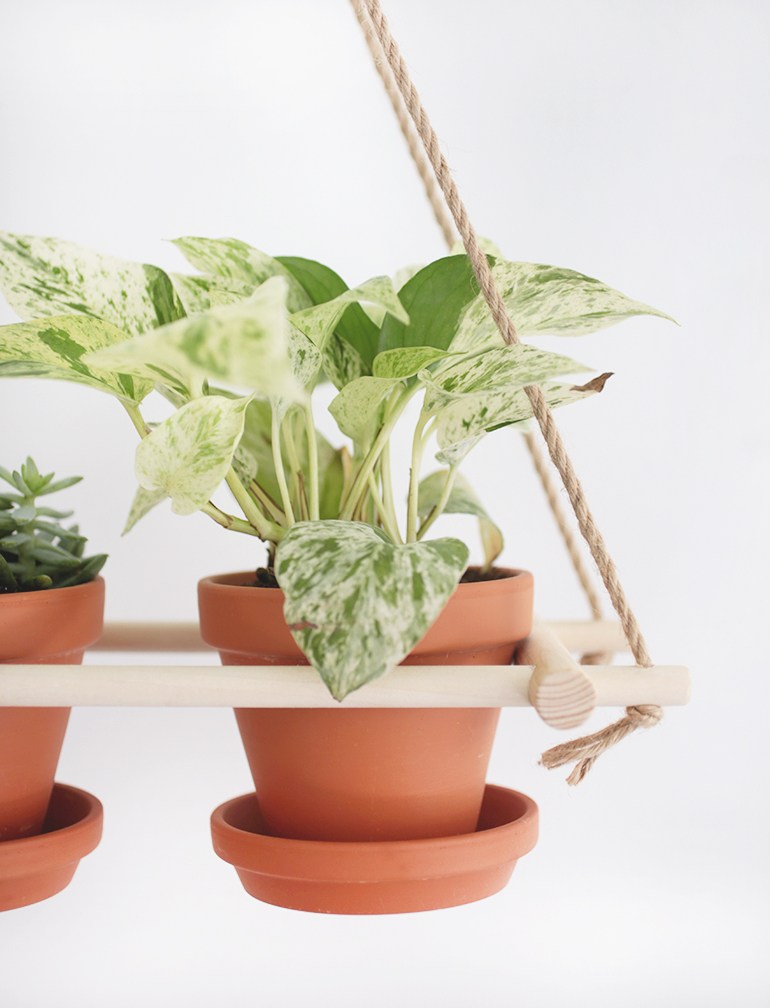
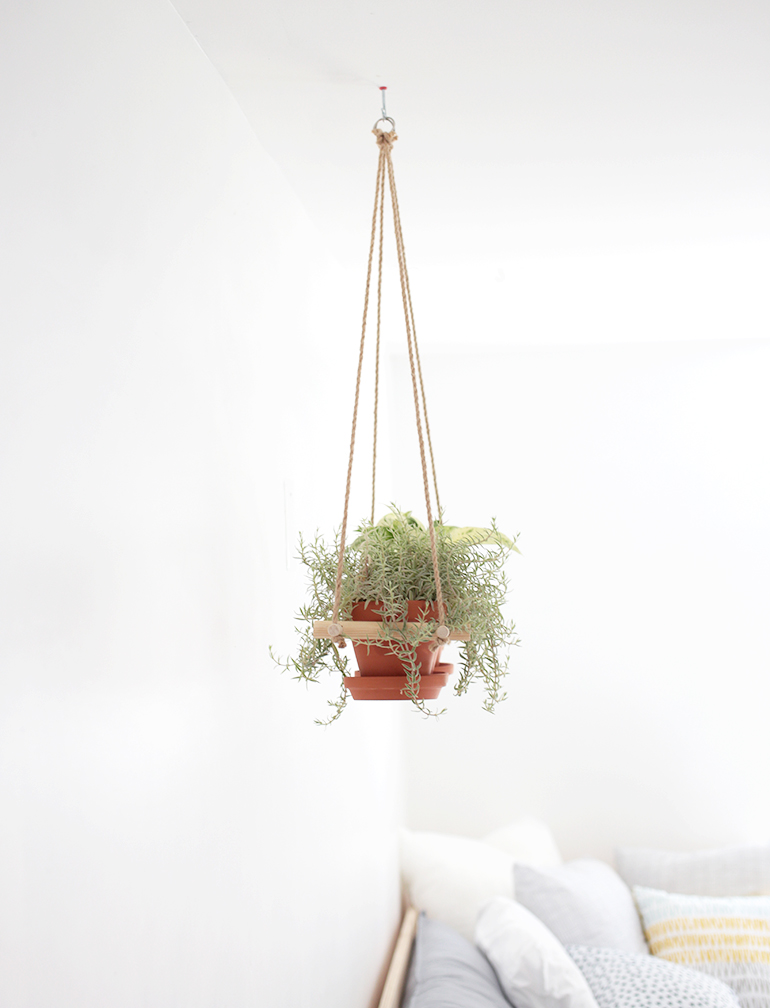
Measure the width of your terra cotta pots below the rim (ours are 3 13/16” ), this is how far apart your dowels will need to be (our dowels are spaced 3 13/16” apart). Arrange the pots as you would like them spaced in the planter, and measure them to get the length the dowels will be, adding the width of your two end dowels and the distance you want the support dowels to extend past the ends (ours extend 1 1/4” at each end). Cut wood dowels to length using miter box, making sure the thicker dowel is used for the end pieces (our side pieces are 20” and the end pieces are 6 3/8”). Drill holes in end pieces for the smaller dowel to fit through using drill press, we came in an inch from the end to the center of the hole. Drill a hole for the rope using drill, 1/2” from ends, making sure it’s large enough for your rope to fit through. Sand all the pieces. Slide the end pieces onto the side pieces, mark where the ends will be with a pencil so you know where to glue, slide the end pieces up a little, add wood glue to side pieces, making sure to smooth the glue all the way around the dowel. Add glue to the other dowel, slide end piece over glue. Repeat at the other end. Let glue dry. Slide rope through the drilled hole and tie a secure knot at the bottom. Measure how long you’d like the planter to hang and cut rope, leaving a little extra to form a knot. Tie the rope around the jump ring. Repeat process for each corner of the planter, tying two ends to one jump ring. If your pots came separate than the bottoms, glue bottoms onto pot, using two part epoxy. Make sure to leave a few small spots on the bottom without glue so that extra water can drain out if needed. Let dry, following manufactures dry time instructions. While pots are drying, place ceiling hook where desired, making sure it’s secure and can hold the weight of the plants, and hang your planter. (You can do two hooks if you’d like, which will make the rope hang straight instead of the triangle shape like ours). Fill your pots with plants and place pots into planter, you’ll need to tilt the pot slightly while sliding it between the dowels.
*Make sure the bottom piece of the terra cotta pot is the same diameter or smaller than the top of the pot, so that it can fit through the dowels.
So do you have a green thumb? What are some of your favorite indoor plants?
-Manda

