


Today’s DIY project is by far one of my favorites that I’ve done on here. I apologize in advance to those of you that don’t have a dad with a garage full of tools that you can borrow…
What you need:
-Scrap pieces of hardwood. I used cedar, cherry, mahogany
-Drill
-Scroll saw
-Belt sander
-Some type of finish. I tried a few different types: homemade natural stain, Minwax stain, and a butcher block conditioner.
How to do it:
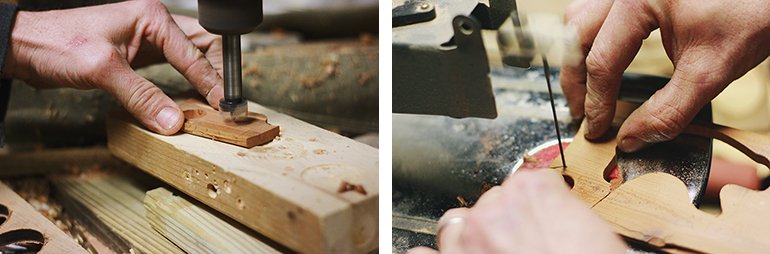
-Use a drill to make a hole about the size of your finger. I made some 5/8″ and some 3/4″.
-Use scroll saw to trim around the hole a bit so you don’t have so much to sand off. Make sure you leave a bit extra on one side if you want to make some sort of design rather than just a plain circle.
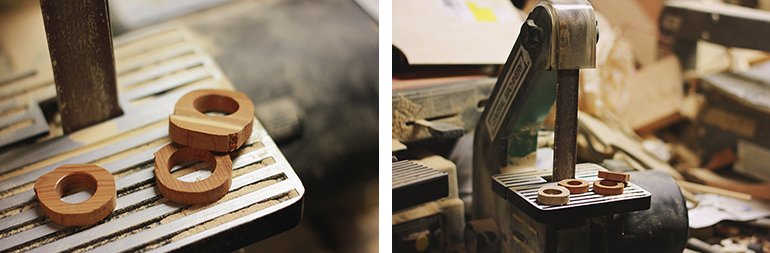
-Use a belt sander to shape the ring as you wish. Make sure you don’t make the band too thin!
-Use a piece of sandpaper to smooth the inside of the ring if you want!
-Use the finish of your choice and let dry.
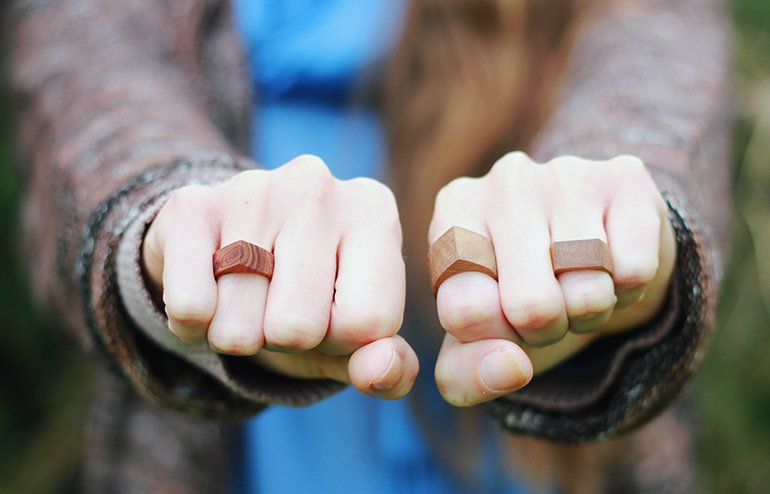
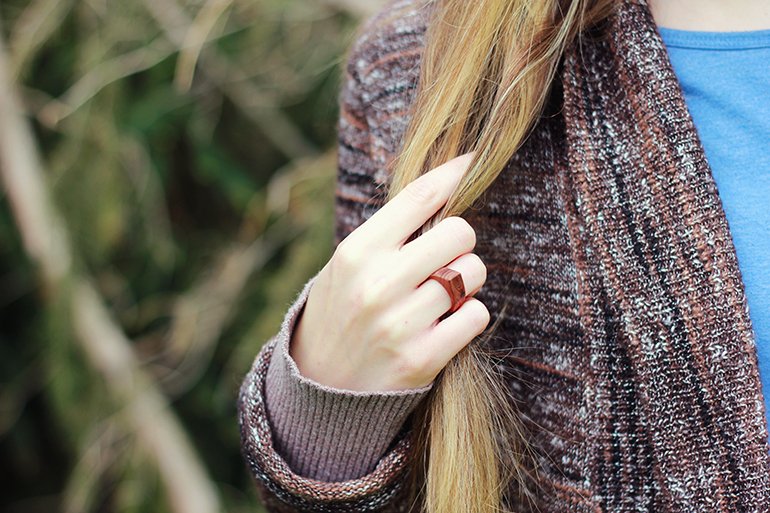

I wear mine all the time and they are such a fun handmade gift to give to friends (that they will actually like!)
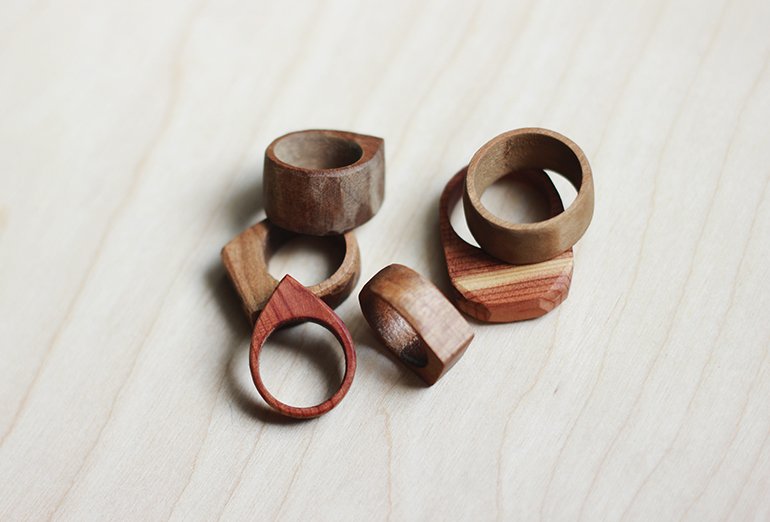
After I made these, I was so pumped! And then my dad brought in some rings that he has been making for his etsy shop and I died! He is so incredibly talented it just overwhelms me. The man can make anything! Check out these beauties that he made:
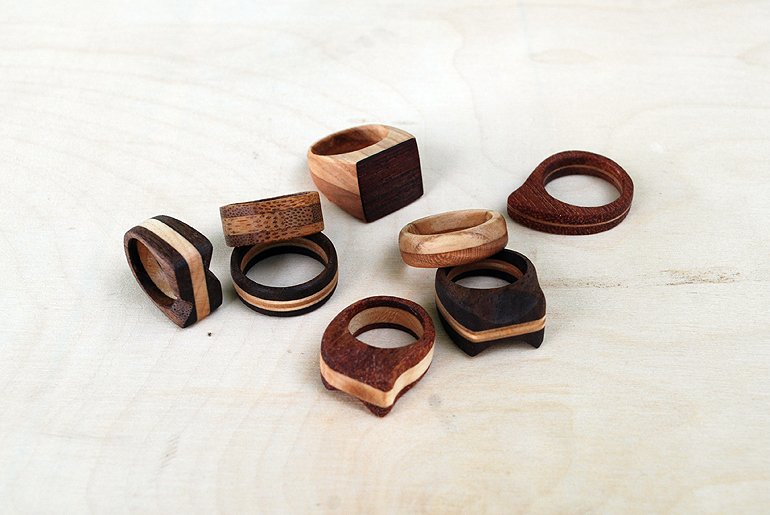
I mean… seriously! *Proudest daughter ever 😉 So if you don’t have the tools to make some on your own, or if you’re just looking for quality that some of us *ehem just can’t achieve… pop over to the The Red Bird Shop and buy yourself one!
xo. Caitlin

