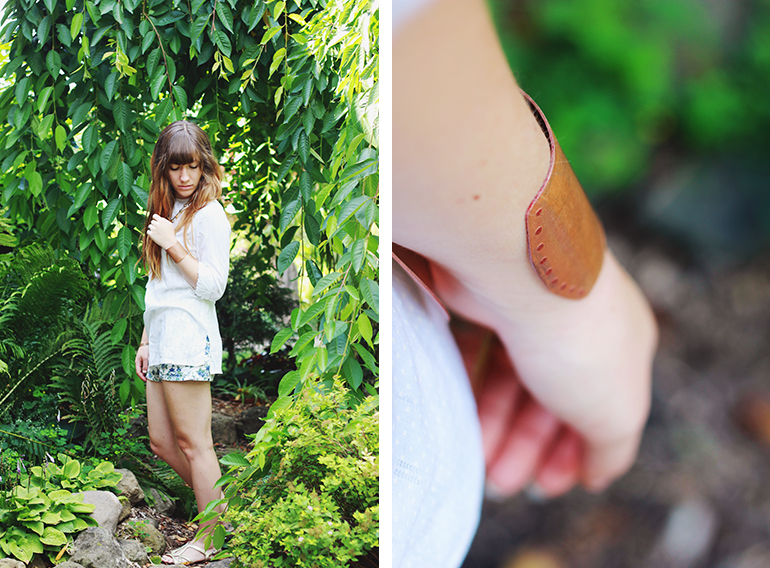
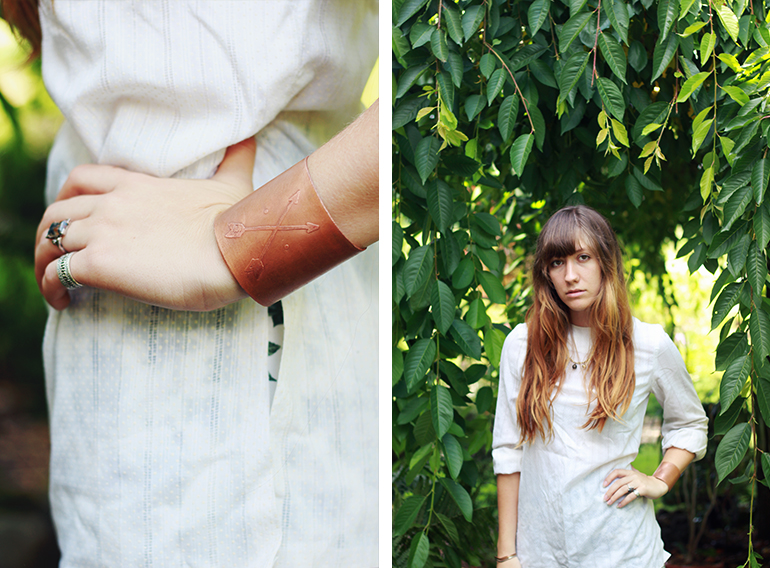
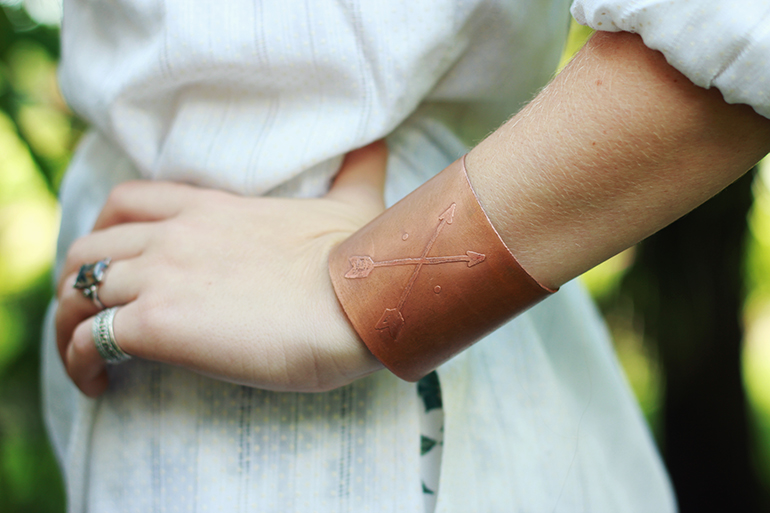
 Alright, people! This might be one of my favorite DIYs I have done in a while.
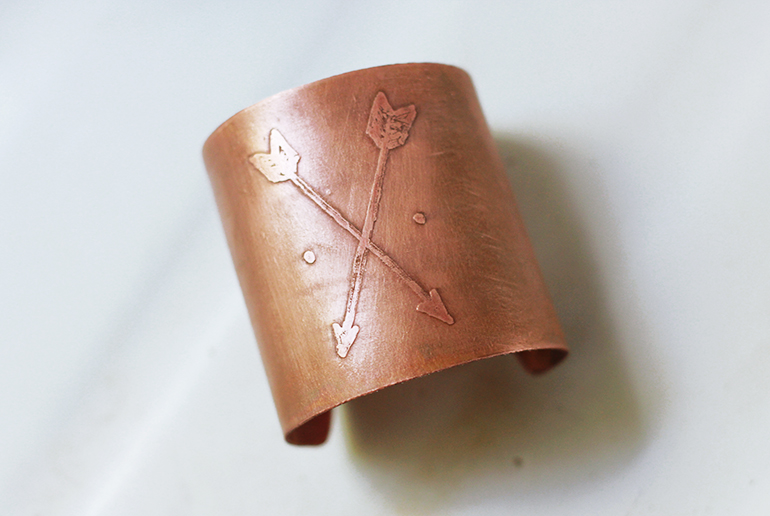
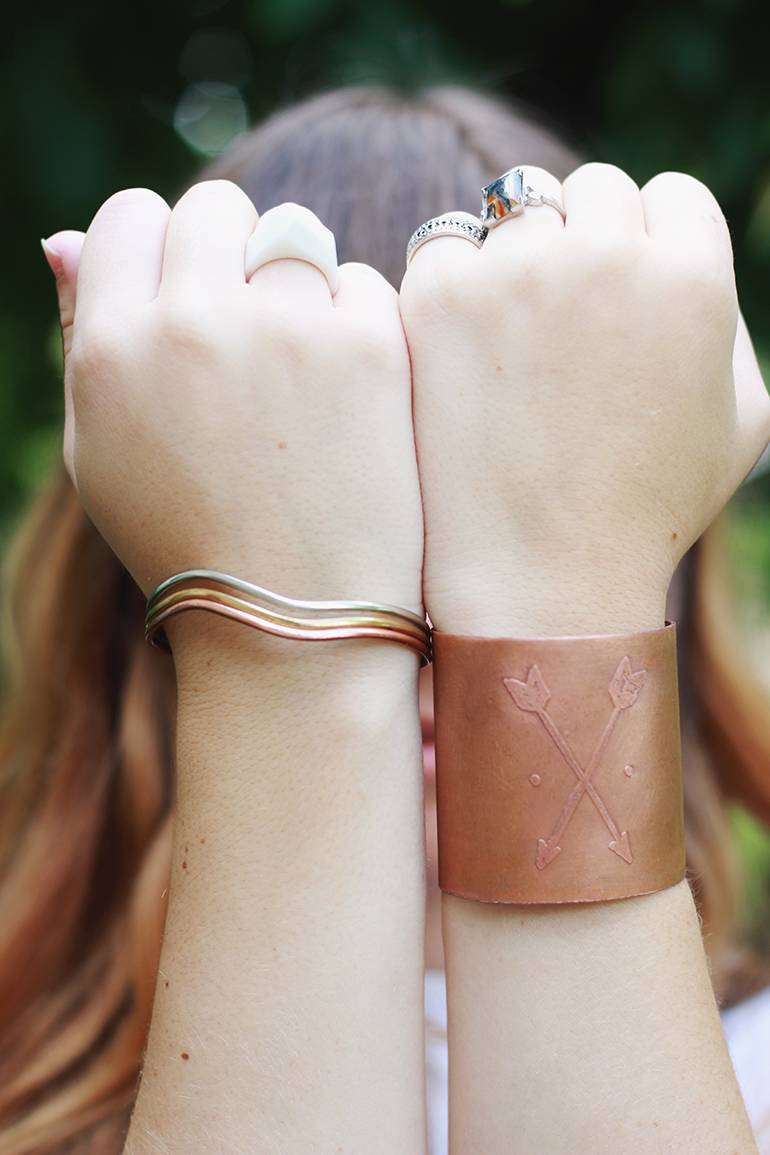
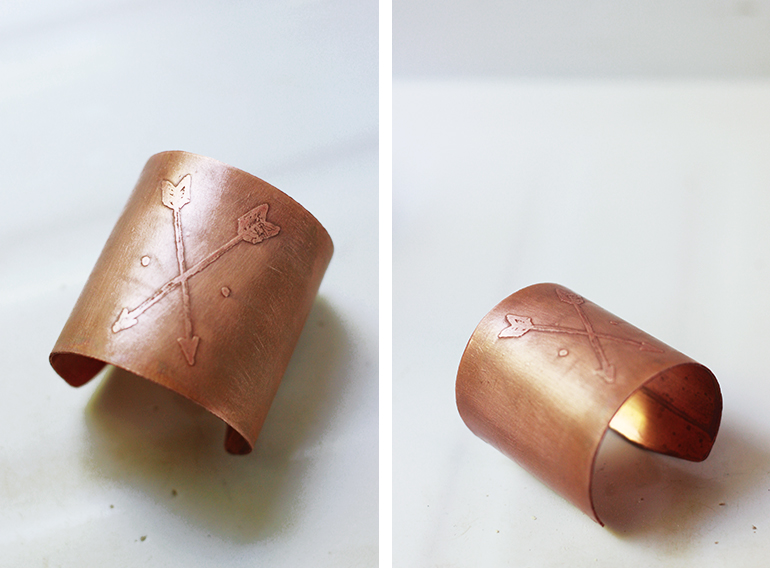
My dad recently started doing some copper etching projects and I was so intrigued! I convinced him to teach me how to do it so I could make this beauty. And now I’ll teach you so you can make your own! … You’re welcome 😉
 What you need:
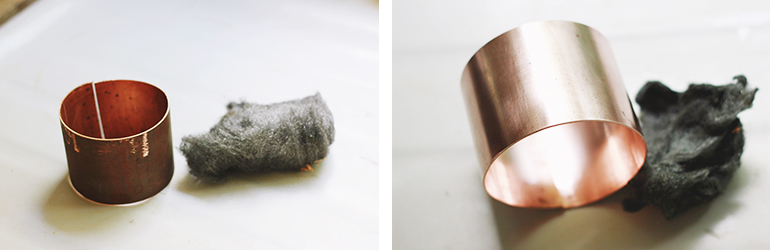
-Copper pipe – I used 3″ but I probably could have used 2″ (Got this from a friend’s scrap pile. Thank you!!)
-Steel wool
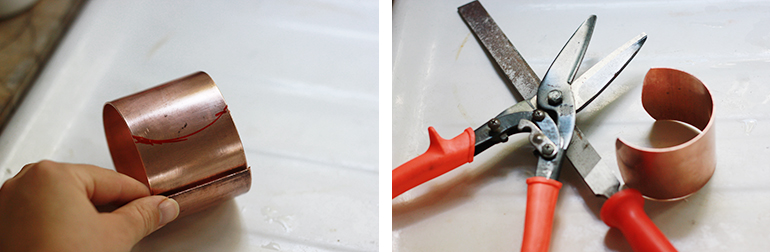
-Tin shears
-Metal file
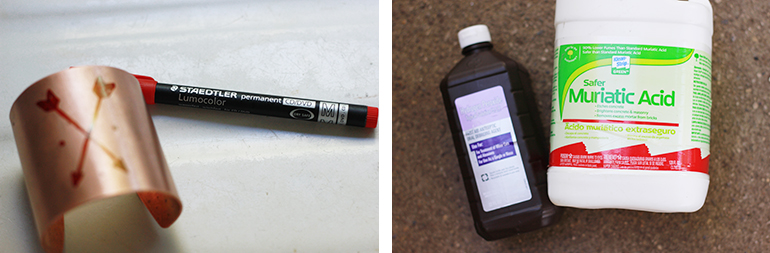
-Permanent marker
-Hydrogen peroxide
-Muriatic acid
-Packing tape
-Scotch brite scour pad
-Baking soda
-Car wax or metal lacquer
How to do it:
-I used the steel wool to clean off the copper because mine was old and used. Then washed it off and dried.
-Dad had cut mine in the back once so I tried it on and we squeezed it together and marked where we would have to cut it so that it would fit my wrist. You could also do this by using flexible measuring tape around your wrist (leave a bit of space to slide your wrist in the cuff) and then wrapping it around the outside of the copper and marking where to cut it.
-Use the tin shears to cut it (I chose to have rounded edges) and then use the metal file to smooth down the sharp edges. Then bend the copper so that it fits nicely around your wrist.
-Use a permanent marker to do a design on your copper. Whatever you color on will be the raised part. If you don’t completely fill in your design it will have some etching in it.
-Line the inside of the cuff with packing tape so it does not get etched.
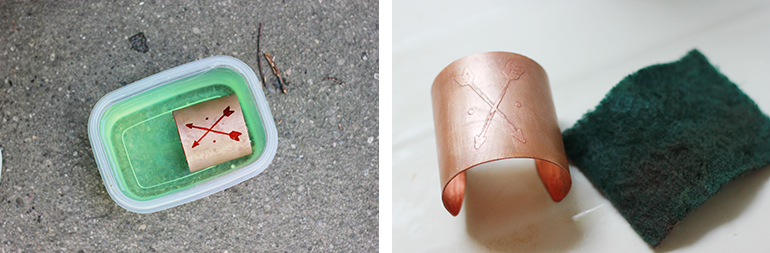
-Mix 2 parts peroxide with 1 part acid – we used an old tupperware container. I would recommend doing this outside. **Use necessary safety precautions during this step. Do not get this on your skin. Also, this is not something that you want to just pour down your drain after you’re done – it should not come in contact with any metal surface. Be sure you dispose of it properly.**
-Be sure your cuff is fully submerged in the mixture. Leave it in for 1-2 hours (depending on how deep you want the etching), move it around (with a stick or something) occasionally to get bubbles off.
-Pour water mixed with baking soda on the cuff to neutralize the acid. (Again, not in your sink.)
-Use scour pad to scrub off the permanent marker and remove the tape from the inside.
-You can finish your cuff by applying car wax or metal lacquer on the entire thing so that it won’t turn your wrist green when you wear it.