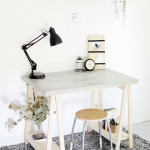
DIY Sawhorse Leg Desk
Ingredients
Materials needed for Desk Legs:
- large piece of paper (or scrap wood) - for scale drawing of legs
- pencil
- measuring tape
- pine boards
- table saw
- power planer
- jig saw
- drill
- hammer & nails or nail gun
- wood glue
- wood stain and/or polyurtherane (optional)
Instructions
How to Make Desk Legs:
-
Do a scale drawing of the legs (we did ours on scrap wood) to figure out the dimensions and angles. Ours are: 28.5" tall by 9" (at the bottom). We made our leg pieces 1.5" wide.
-
Cut enough 1.5" strips from the pine board to make the leg pieces in the drawing, cutting 1/16 of an inch larger than you need so that when you power plane the saw marks off the edges you will end up with 1.5".
-
Cut your 8 leg uprights to length, cutting the top and bottom of each piece at a 5 degree angle so that they sit flat on the floor and against the bottom of the table.
-
Cut your 4 shelf supports and your 4 upper desktop supports to length (ours were 23").
-
Cut a 5 degree angle along one long edge of each of these support pieces with the table saw so that the shelf and table supports sit flat.
-
Mark out the notches in the legs for the shelf and table supports to sit in, then cut out with a jig saw (you could also use a scroll saw or a coping saw).
-
Glue and nail the supports into the leg uprights making sure everything is kept square.
-
Using the table saw, cut a piece that will go between the two upper supports with a 5 degree angle on each of the long sides. (We determined the dimension of this from our scale drawing).
-
Glue and nail the piece between the upper support pieces.
-
Cut shelf to size, cutting a 5 degree angle with the table saw on each side so that the edges will be flush with the leg uprights.
-
Smooth edges with the power planer and glue and nail shelf place.
-
Once the glue has dried, sand the legs.
-
Determine how far apart your 2 leg pieces will sit, this will depend on the size of your desktop and where you want the legs to be under the desktop (for ours, the outside of the leg pieces line up with the edges of the desktop).
-
Cut and attach two cross pieces to fit between the tops of the legs to secure the two sets of legs together and to give support to the desktop (we used 1x6 pine board and the two pieces were 33.5"x7 1/4").
-
If desired, a finish can be applied to the legs.
Attaching the desktop to the legs:
-
Apply silicone caulk to the support boards where the concrete top will sit.
-
Set concrete top on top of the silicone.
-
Apply sealer to concrete, following directions on sealer can.