


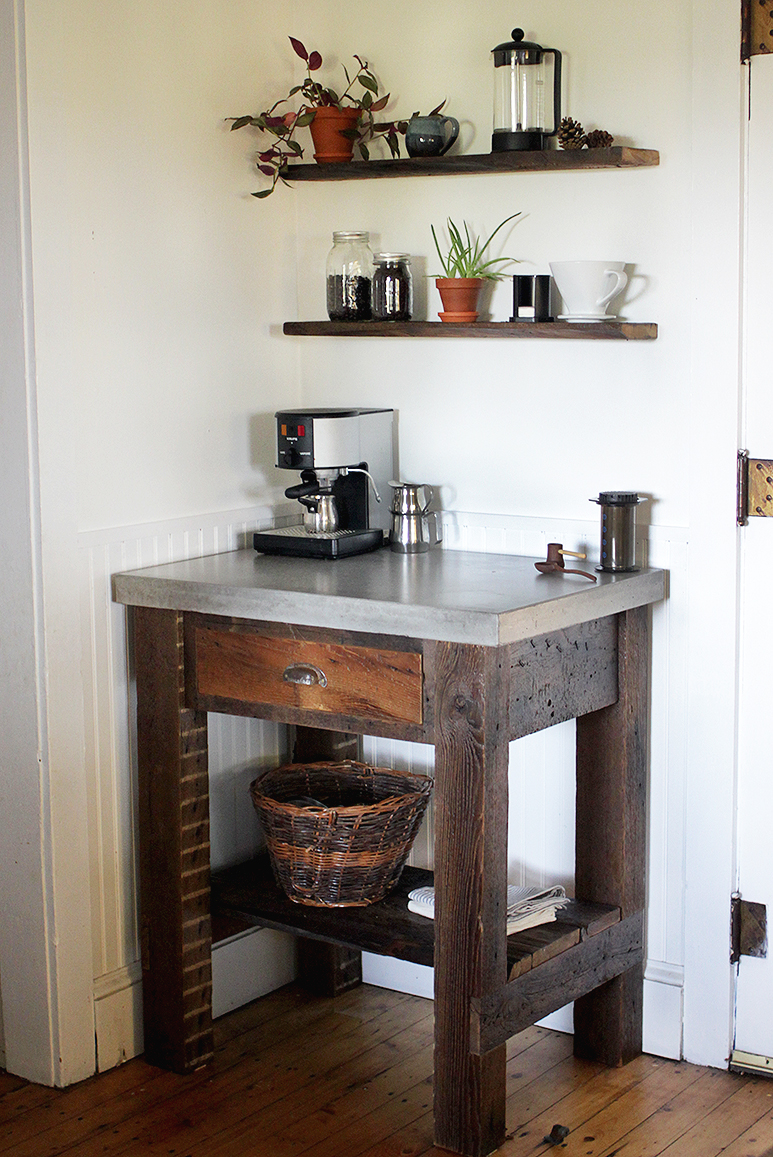
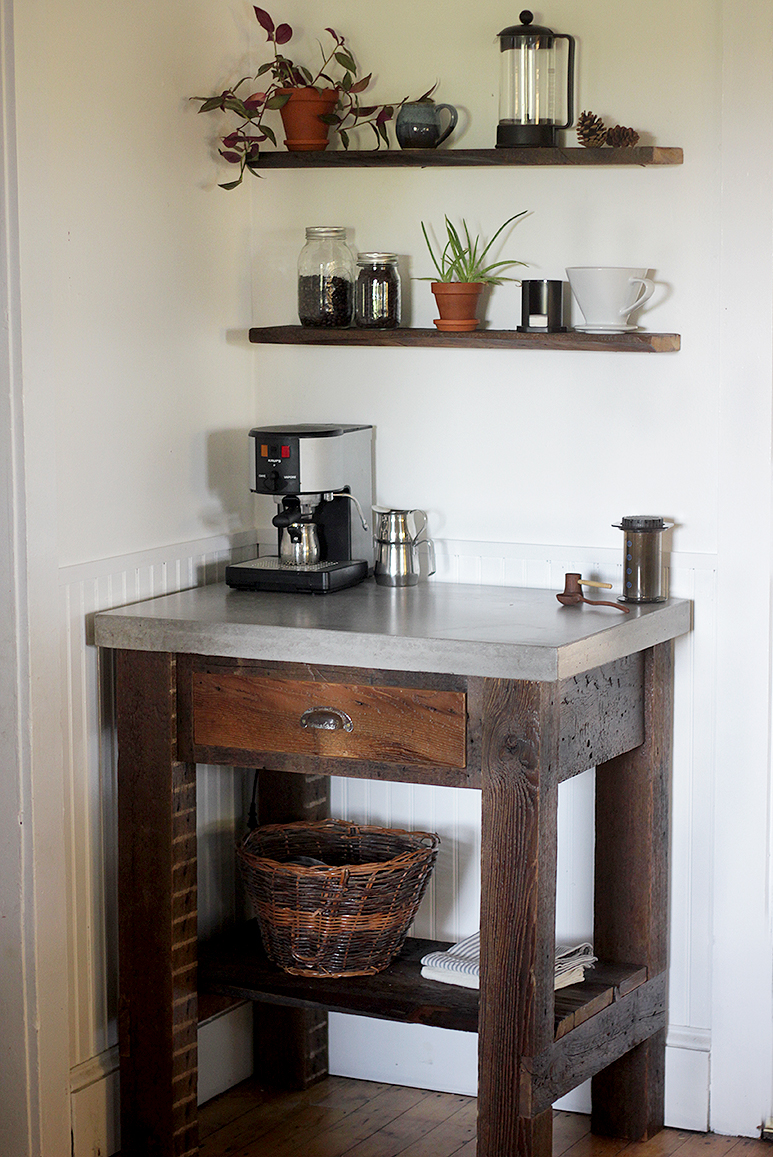
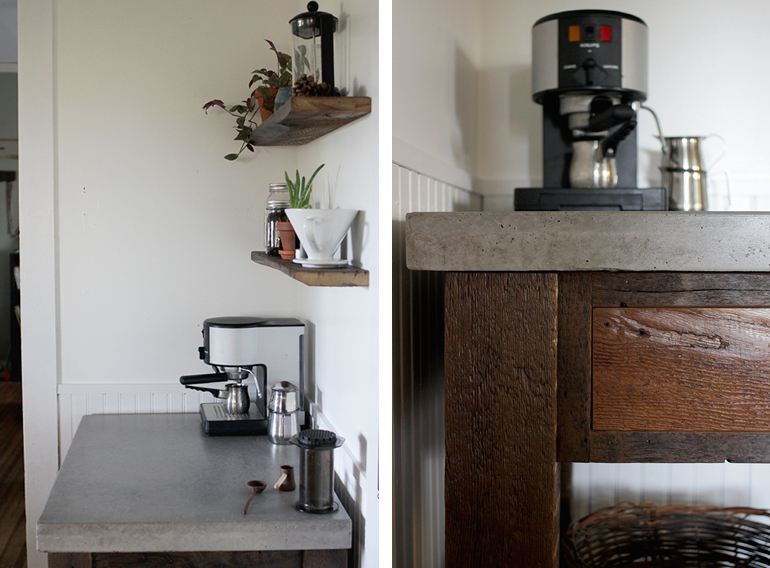
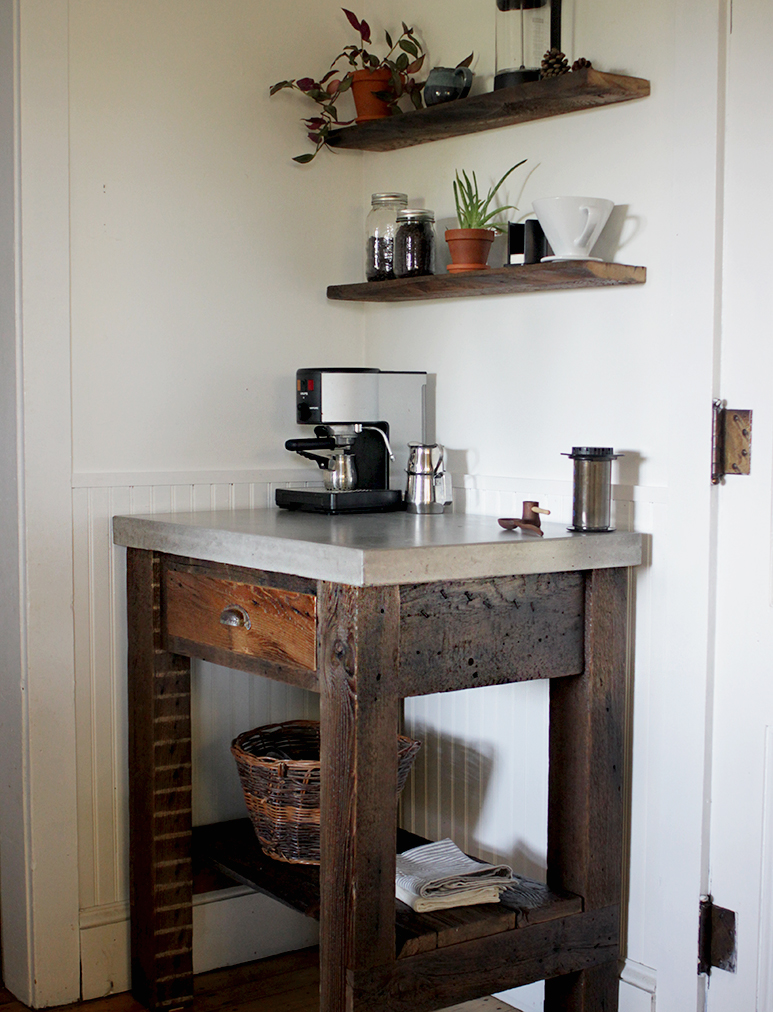
I’ve wanted a coffee bar in our kitchen for a while now. Since we’re pretty into coffee around here, and have a lot of coffee-related equipment and accessories, I thought it would be nice to have one spot for it all to sit. We decided to build a little coffee bar in an unused corner of the kitchen. I love our new little spot and it’s nice to have all the coffee things in one area together!

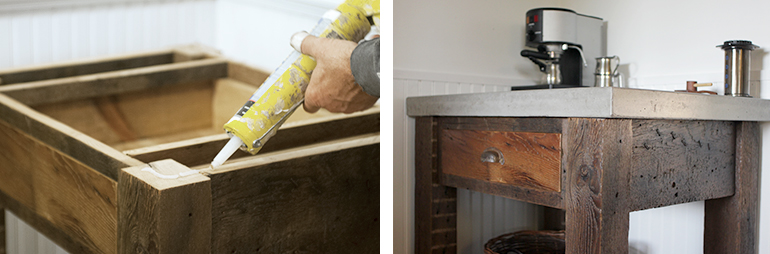
I’ve been a fan of concrete countertops for a few years and thought this would be a good chance to get a bit of it in our kitchen. Mike was game for trying it out, so we decided to build a concrete top on the bar. I was so nervous when we finally got to the point of removing the form from around the concrete, but it turned out great! I love the concrete! I told Mike it’d be fine to redo the counters in the kitchen. 😉
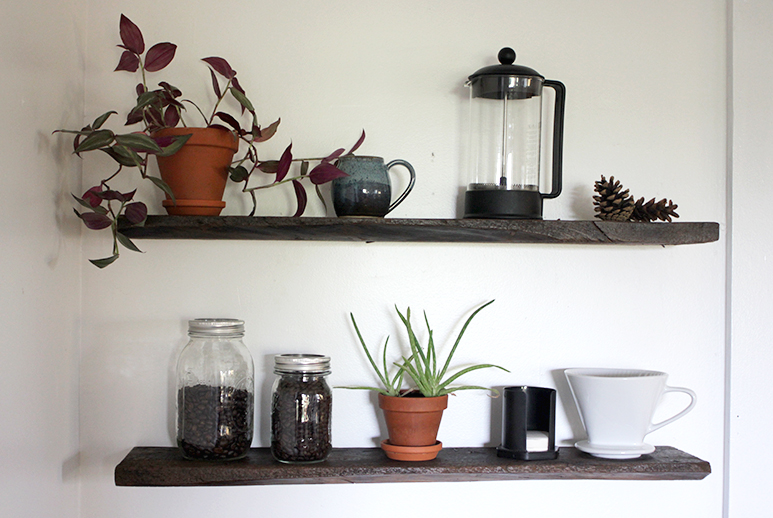
The rest of the bar was made with reclaimed wood that Mike had (recognize the legs? They’re the same wood that’s on the coffee table). Mike also put up a couple floating shelves above the bar for extra storage.
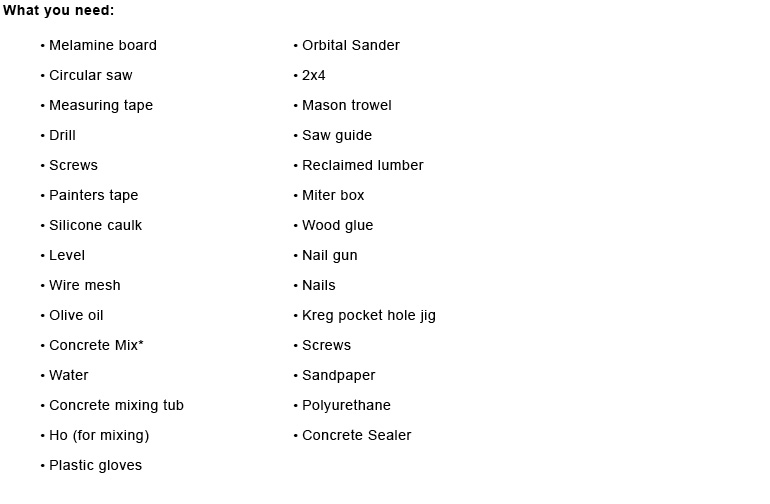
How to do it:
Concrete Top: Cut melamine board to create side pieces & bottom of form. The side pieces should be the thickness of the melamine board plus the thickness you want your countertop to be (our side pieces were 2 3/4″ because we wanted a 2″ thick counter). Cut side pieces to length so that they form a square around the bottom, two of the sides will be the same length as the side of the bottom where they attach, the other two sides will be 1 1/2″ longer so that they overlap the other two sides. Drill holes 3/8″ up from the bottom edge of the side pieces to attach them to bottom of form, also drill holes in the ends of the sides which are longer than the bottom. Line side piece along the edge of the bottom piece and pre-drill holes thru so the wood doesn’t split. Put in screws and screw together. Repeat with all 4 edge pieces. Wipe inside of form to remove any saw dust. Place painters tape around around inside edge leaving a gap big enough for a bead of caulk. (Cement can react with silicone changing the color of it, the tape keeps any smeared caulk off the inside of the form, leaving just the thin line along the edge.) Caulk along the inside edges, going up along the corner seams too. Smooth out the caulk with your finger to remove any excess and round the corner. Let caulk dry according to directions on tube. Once dry, remove tape, make sure to pull tape back toward itself not sideways. Set the mold on a flat surface and make sure it is level. Coat the inside (bottom & sides) of the mold liberally with olive oil (this is to keep concrete from sticking). Pour concrete mix into concrete mixing tub. Add water a little at a time and mix until the concrete is about the consistency of oatmeal. (You don’t want it too watery as that can make a weaker counter.) Pour concrete into mold, it should be about half full, and smooth out. Once smooth, use an orbital sander along the outside edge to vibrate the mold – this gets air bubbles out. Place the wire mesh (cut so that there is a 3/4″ gap between it and the sides of the mold) in the center of the mold. Mix more concrete and place over the mesh. The concrete should be level with the top of the mold. Smooth out and repeat the step with the orbital sander. Using a 2×4, firmly press the board across the top of the form to smooth and level the concrete, this can get a bit messy. Let dry for a couple hours, then go over the concrete with a trowel to help smooth it out. We let the boys leave their handprints in the cement at this point. 🙂 Cover with plastic and let dry according to the directions on the bag. We let ours dry for 3 days. Once dry, remove the screws from the form and pull off sides (they will stick a little from the silicone). Carefully lift the concrete top to it’s side and pull away the bottom. Sand off any rough edges. We let ours dry for another day outside of the form.
* We used commercial grade Quikrete 5000 concrete mix. They do make countertop concrete that you can special order from most home improvement stores. Mike thought that definitely was overkill and that regular concrete would work just fine. 🙂
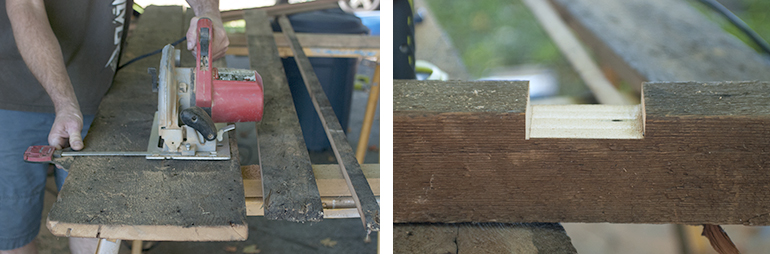
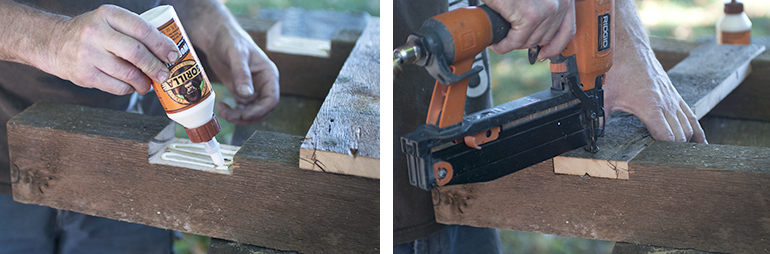
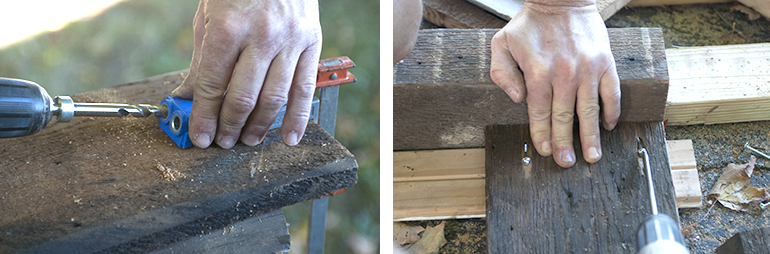
Base: Cut board(s) to width to make the front, back, side pieces and shelf supports. Then, cut the sides, front & back to length. Cut legs to length. Notch the legs for the shelf support. Cut shelf supports to length. Glue and nail the shelf support into the notches on the legs. Using the pocket hole jig, make pocket holes on the inside of the front, back and the side pieces. Screw the sides to the legs. Then screw the front and back pieces to the legs. Sand table base and apply polyurethane. As you can see, our coffee bar has a drawer in front, our directions don’t include steps for making a drawer (a post for another day), these steps are for making a base with no drawer, so the front would look similar to the sides/back. You can always google how to make a drawer if you’d like to add that in – this post would have been way too long if we included that today…
Attaching the top: Apply silicone caulk to the top of the table base. Set concrete top on top of the silicone. Apply sealer to concrete, following directions on sealer can. (We actually just used a water-based polyurethane to seal our concrete – the local store was out of concrete sealer…so far so good.)
Do you have a coffee spot/bar in your house? Would you ever want to put one in? Come on over for a cup of coffee at my place! 😉
-Manda

