


 Embracing my good ‘ol Irish genes this week with St. Patrick’s Day coming up quick! This is a quick braided hair tutorial with a few fresh shamrocks tucked throughout. It’s the perfect do if you’re looking for a simple, romantic style!
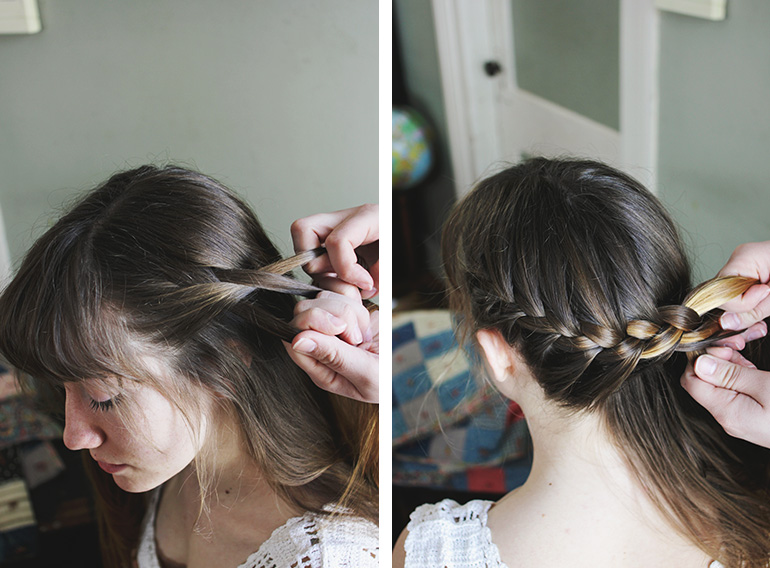 Here’s how you can get this look! Start on one side of your head and start french braiding down to the nape of the neck. Once at the middle of your neck, start braiding upwards towards your opposite ear.
 Stop pulling hair from the bottom half of your head and only add small sections of hair from the top into your braid until you get to your ear. Finish the braid and then use your hands to loosen up the braid.
 If you have too much hair hanging in front of your face, you can twist back a section and pin it under the braid. Wrap the braid around your head. Use bobby pins to secure the braid and any little (or big ^) bumps in your hair.
 Tuck the loose ends of the braid back through the already french braided hair. Cut shamrocks or clovers (Wegmans has Shamrock plants for sale right now) and tuck them throughout the braid.


Try it out this week and share a few photos with us!
xo. Caitlin

